Tuesday, November 1, 2011

Final Touches


These are some shots of the vessel with a coat of varnish and showing, in the second shot, the way to adjust the length of the cord.
I love the way the varnish adds depth and a glass-like shine to the sanded and buffed polymer clay.


Sunday, October 30, 2011

Modified Design


I decided to remove the brass findings at the sides of my vessel and drilled holes through the bottom and top, to suspend it, in the traditional way of inros. I was worried that the attachments could eventually be bent, through wear, and possibly crack the clay at the sides. I also saw that, to my eye, the extra brass, though attractive, seemed to make the piece too busy. The modified style does not have either of those drawbacks and should be even more durable.
I took some informal shots again to demonstrate. Once varnished the depth of the colors will be emphasized to a greater degree, and will be more obvious in higher quality photos. This is just one of the quick shots I've taken, as I progress through the little project.


Thursday, October 20, 2011

Wearable Vessels Evolving


I've been continuing on my quest to create wearable vessels and have been mastering new techniques. This also includes new forays into caning and mica shift. In my newest piece, the canework captured the mica shift beautifully.
I molded the clay around an original form so it is truly one of a kind. This vessel, based on an inro, (small lacquered, wearable vessels originating in Japan) is bigger than my first, and I plan to gradually work up to more practical pieces big enough to use as small purses.
The Japanese inros were decorated all the way around, from what I understand, and so are my vessels.
I have some shots of it, in it's still unvarnished state. I may make some matching slider beads, and accent beads for dangles. These are informal quick shots, done on the fly.

Tuesday, October 11, 2011

New Explorations in Polymer Clay


The passion for claying continues and I've been exploring new techniques and materials which combine so well with polymer clay. Wearable as well as functional art jewelry is one avenue I've been exploring, as well as drilled hollow forms, in the context of big lentil beads. Pearl Ex powders are used in one of my pieces shown here as well.
The photos will demonstrate where I've been going.

Saturday, April 16, 2011

Doing Tutorial Specific Work For the First Time


For as long as I remember I've been reading or buying books to teach me the subjects of my passions, from gardening to computers to art which was my first love.

Polymer clay books have been added to my collections and read voraciously. Many, maybe all, of the techniques I now use have been learned or absorbed from my reading.

Until just this week, however, I had never done the specific subject of a tutorial in any of my polymer clay, or jewelry-making books.
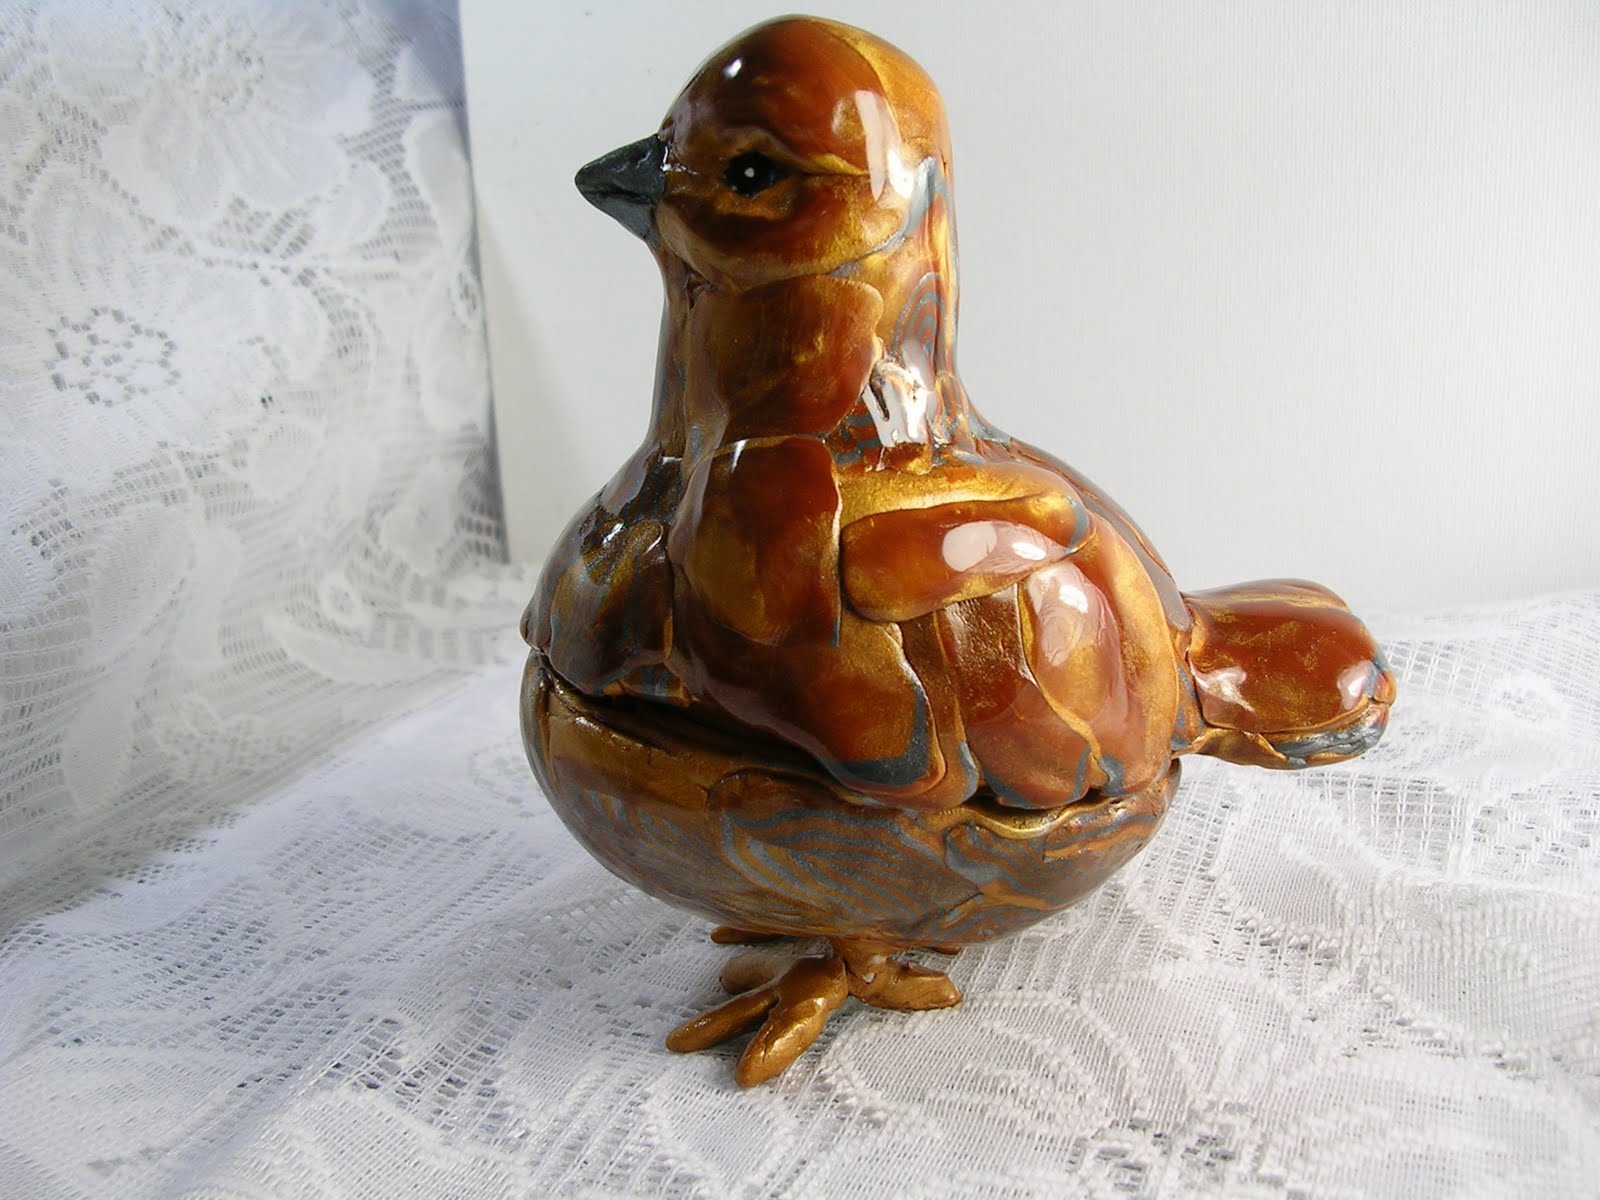
The first one was a scarab beetle from a tutorial in the August 2008 Polymer Cafe, written by the talented and accomplished Les Polinko, which grabbed me back then and finally, just lately followed, with encouraging results immediately. I used silver alcohol ink for the first time on one, and drilling, backfilling and sanding on the other one, which is a work in progress. I loved the ease with which these materialized and will have to make more.
Many of the species actually look like jewelry and will be a joy to form from polymer clay.

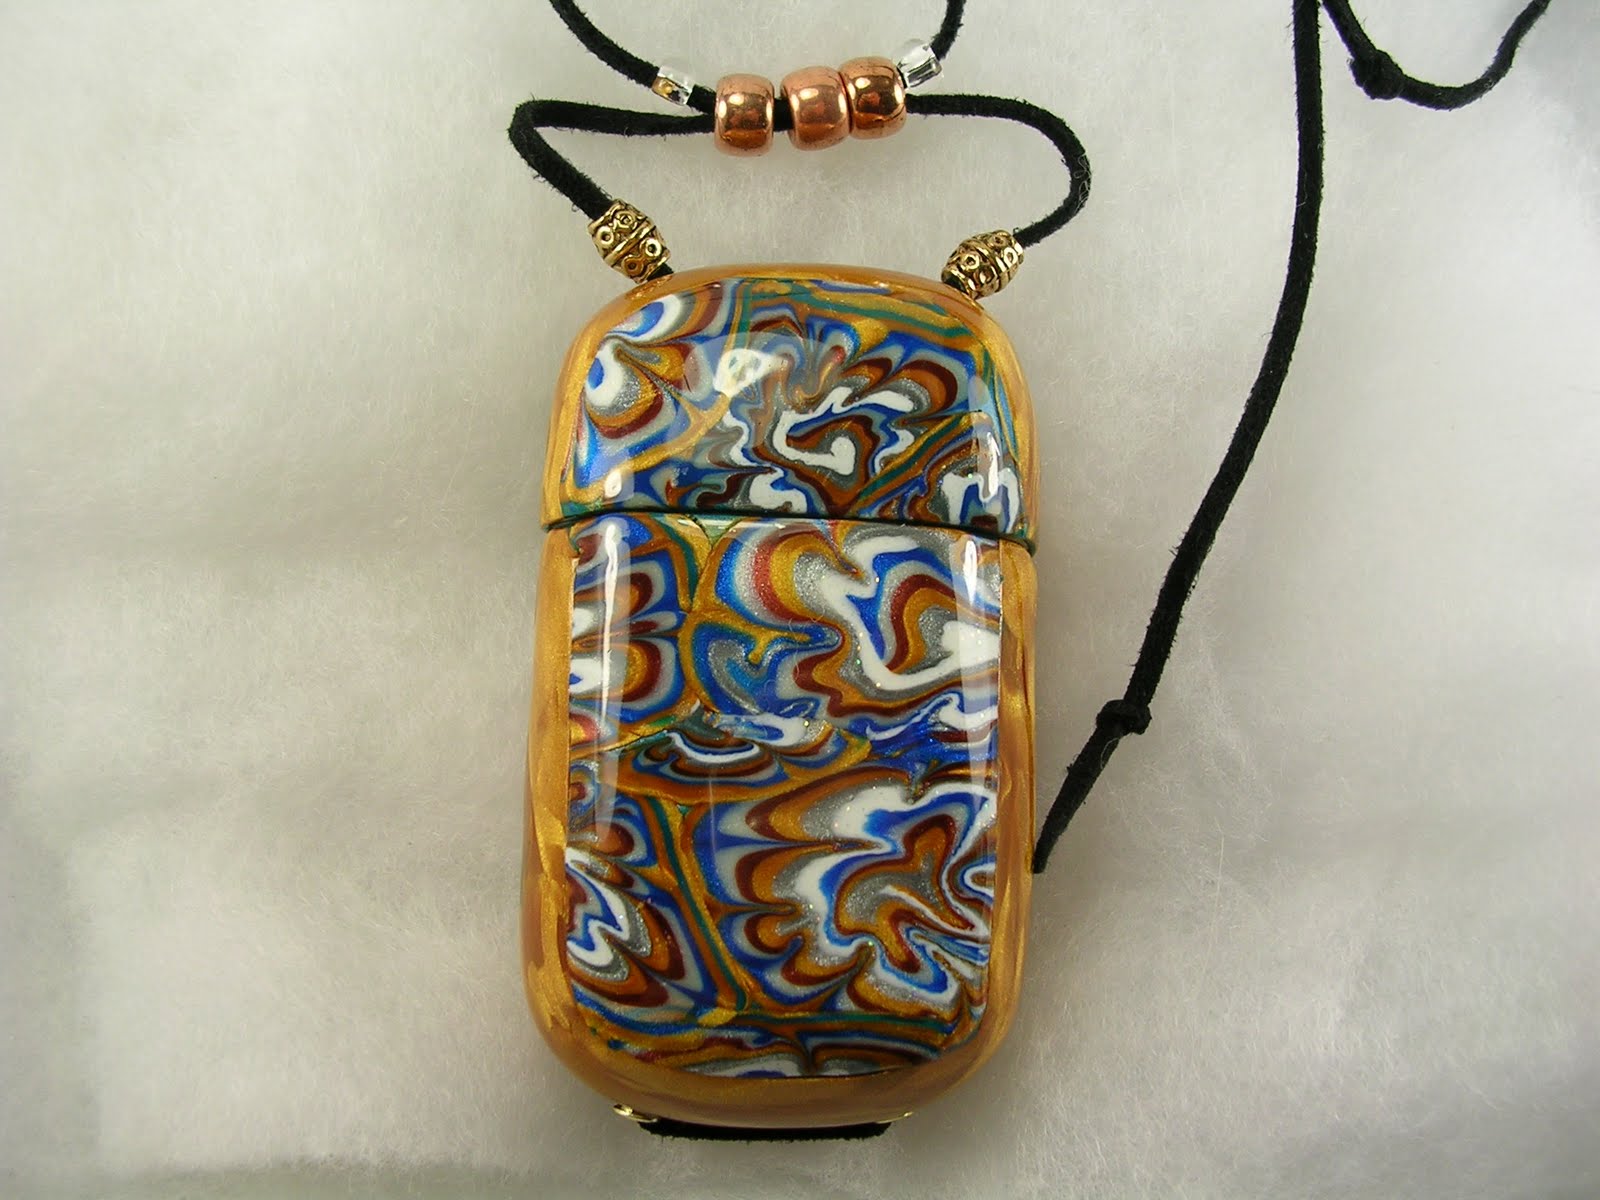
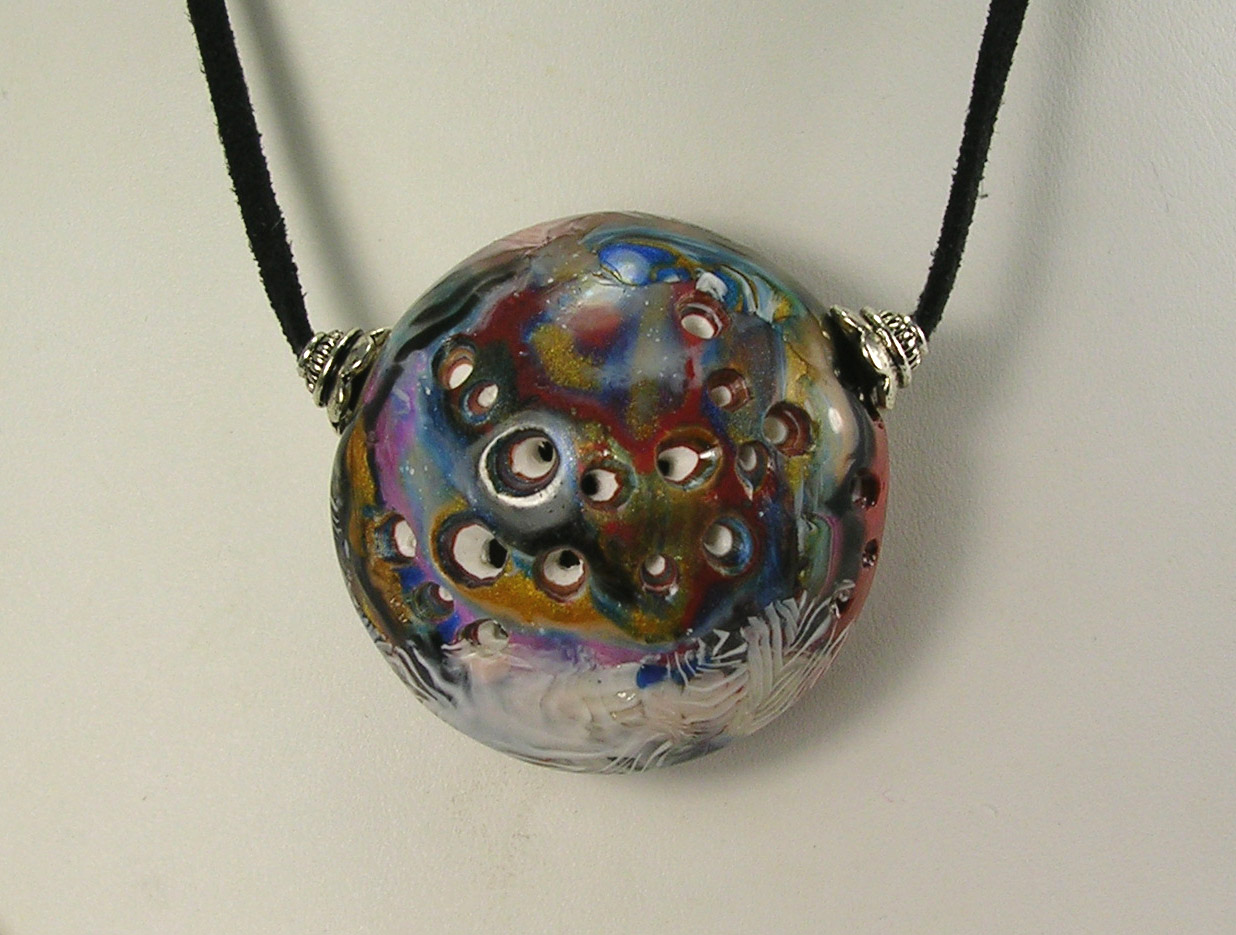
My next subject is based on a very cute steampunk fishy seen through a porthole. This came from "Steampunkery" by Christi Friesen, my latest addition to my ever expanding polymer clay library. I picked it up immediately without even opening it, knowing that I had to have it, having seen her work published for years and been enchanted by the adorable interpretations of her subjects, based on nature which, for me is home territory.
When I saw the project, I had to make one for myself and there are other tutorials that I plan to follow in that excellent, sometimes hilarious, and very informative read. The first of the Christi Freisen books to be added to my library.
The pendant is filled with resin in her book, unlike mine which I left as, is knowing that the eye bead sticks out too much to cover well without a dimpling effect, so adding bubbles instead to get a kind of 3D effect. My porthole frame is rough (maybe dented) and there would have been more gears and cool "steampunk" components if I could have found them but it's just for fun and I plan to refine my portholes in future projects.
I plan to do more along this concept also being more careful with depth of my eye placement, because I love the idea, and have now spent hours re-organizing my gears, gizmos, and other vintage findings, [which took a catastrophic tumble a while back, in a scenario involving a laundry basket piled high with multiple full component cases (satisfactory idea) and placement of said basket on a small rolling mechanic's stool (very bad idea indeed!)].


Friday, April 8, 2011

New Directions in Polymer Clay


I've been continuing to explore new techniques and new ways to cover eggs with polymer clay. I have literally taken my eggs in a new direction by orienting my egg shaped vessels vertically instead of horizontally like my first several eggs. This results in greater storage area within the egg and the vertical presentation is so effective in my opinion. One aspect of this presentation is a stand is needed now matter how well the egg is balanced. I just used a crystal napkin ring I picked up at a flea market for the photos and will eventually create stands for them from polymer clay.

I have also been playing with alcohol inks as a color medium and love the effects. With the alcohol inks you get a lovely transparent color, as opposed to acrylic paint which even thinned does not equal the saturation when trying for a transparent effect.

Both of the eggs pictured started out as pure white with color added using alcohol ink and in the case of the faux turquoise egg some black acrylic paint. The transparency of color seems to give the textured egg an appearance of glazed ceramic, and the darker one an extra glassy finish as there is some depth to the color.

The pendant I just finished uses the drilling technique perfected by Geffery Lloyd Dever which I learned from a tutorial in "The Art of Polymer Clay" by Katherine Duncan Aimone, and another in the March 2008 issue of "Art Jewelry" an magazine often featuring tutorials by leading polymer clay artists as well tutorials on creating fine jewelry from precious metals and gemstones.
My bead has some holes that ended up too large on one side but the larger opening allows for seeing into the object and opens up possibilities for adding elements to the hollow interior. I consider this piece to be wearable by me but I can see where my work needs refinement and continually try to accomplish this.

I've been playing with large hollow formed, drilled beads off and on for a while now and love the effects of layering colors and then drilling to reveal the under layers. This bead also features translucent overlay canes which are covered in Donna Kato's book "The Art of Polymer Clay Millefiori Techniques". I've come across this technique in some of my other reading as well. I read extensively on Polymer Clay and love learning new ways to work with it. I plan to continue on adding interest to polymer clay by texturing, drilling and also carving and backfilling, which I have yet to explore.

Wednesday, February 23, 2011

Other Interests and Activities Kept Me Away


I had a very busy spring and summer taking care of my gardens and when fall ended the gardening season, I got back into my polymer clay, experimenting with taking egg shaped vessels in an entirely new direction.

I've always loved birds, with their cute feathered bodies and adorable mannerisms. The way they hop instead of walking, and the way they tilt their heads. They were one of the first creatures I sculpted. I used Sculpey III, because it was the lowest price, for a beginner like me, and my sister who introduced me to polymer clay had sent me a good sized starter kit. I didn't have a pasta machine then and the easy conditioning made it more appealing to me so that's what I continued to buy. At the time Sculpey was used as the clay of choice in some of the featured books too.

With the addition of a Michael's to our area, Premo has become my clay of choice. From what I understand, there have been many changes and additions to some of the brands, (Fimo especially) and I don't even know if Premo as I know it today even existed back in 1999. The egg shaped vessels, in my previous post, and the birds seen here are made with Premo. I love the fine texture and the way it comes up to such a high gloss with sanding and varnishing. I still buy the florescent shades of Sculpey, at times too, which I combine with Premo to get a brighter effect.

The first photo shows one that I made as a gift, to my sister, who loves chickens in art. That was my first chicken, and I realized that they are both cute and some of the breeds are really beautiful.
I've also been covering pens too, and and testing them for durability. I plan to share more on that later, and I'll try to come back more often.